Page 1 of 5
Lair Tutorials + Resources
Posted: 02 Jul 2013, 14:48
by Lia
Tutorials
Free Programs
Resources
Re: Lair Tutorials
Posted: 02 Jul 2013, 14:50
by Lia
How To Make Display Cases (Or Tables And Other Shiz)
Step 1:
- Go to Google and type in 'wood carving' or something of that nature to find a nice wood pattern that you like. This will be for the bottom of the display case. I used this. Size doesn't really matter, because you can scale it down later. Make sure the image is rectangular, otherwise you're screwed. If you're putting some things insides the display case, it's better to choose a simpler carving or just a flat wooden texture.
Step 2:
- Once you have something, copy the image and then create a new document in Photoshop. If you copy the image first, it should adjust the dimensions automatically. Use the crop tool to cut any excess background out so that you just have the carving showing. After that, use Canvas Size under the Image menu to add 20 percent to the x and y axes so you have extra room to play with (make sure you tick 'Relative').
Step 3:
- Go back to Google and search for a plain wood to match your bottom. If you're semi-experienced and know how to use things like Levels, Curves and Selective Coloring, don't worry about matching the tones exactly. I tend to choose textures like this, to show direction and dimension.
Step 4:
- Paste your texture into the document. It's probably going to be huge in comparison to the background that you picked. If so, hit Ctrl+T to open free transform, and scale it down so that the edges match up perfectly. If you drag the sides inward, it should snap into place against the lower layer.
Step 5:
- Hit Ctrl+T. Make sure that you have the center bottom selected as the transformation point, and then drag the top down until it's perfectly aligned with your canvas. It should snap right into place. Click any other tool and tap enter again. If the texture's gone a bit blurry, sharpen it up by going to Filter > Sharpen > Smart Sharpen and setting the amount to 90% with a radius of 0.3, and remove gaussian blur.
Step 6:
- Once you've done that, adjust the texture so that the bottom edge is touching the top edge of the carving. Hit Ctrl+T once again, and then right-click the layer and select Perspective. Dragging one of the upper corners of your texture, pull the top edge out until your H angle is 45*. Once it's exactly 45 degrees on either side, click any of your other tools on the left-hand side and tap enter. Every corner should touch the corners of your canvas. If your background isn't square, you'll probably have to adjust the width or height of each side.

What you're doing will look vaguely like this - but don't try to copy me exactly because I effed up a little bit with adjusting the size. :)
Step 7:
- Click Ctrl+J to duplicate your top layer. Use Ctrl+T again, then right-click it and select 'Flip Vertical'. Line it up so that it creates the bottom edge of your image. Repeat steps 4 through 7 for the left and right sides of your image, but make sure you flip the texture accordingly. Once you're finished, use the crop tool to get rid of any excess background or edges.

Step 8:
- You need to give your sides a sense of dimension. Selecting one of the layers, add a gradient overlay by going to Layer > Layer Style > Gradient Overlay. Make sure you're using the default black to white gradient, then adjust your settings so that the wood gets darker towards the bottom. I set mine to Soft Light for the blend mode, with an opacity of 30 and 100% for the scale. Do the same thing for every other side, but adjust angles accordingly. You may have to do some dragging of the gradient to get it just right.
Step 9:
- Go back to your carving (or bottom) layer and go to Image > Adjustments > Levels. Adjust the center slider until your tone matches up with the edges. After that, add an inner shadow in layer styles. You want to give the appearance that the sides are giving a shadow. Make sure your blend mode is set to Multiply and your distance is 0. I put 33% on choke and 35px on size, but yours may vary.

Step 10:
- By now, you should be halfway there. Now we need to add the top of the case. If you have some excess edges and background, use the crop tool to get rid of that. Then create a new layer by hitting Ctrl+Shift+N, fill it with any random color, and adjust Fill to 0%. Add a stroke using layer styles. Make it as big as you want, but be mindful that this will be the wooden edge of your counter. (Make sure you have Position set to Inside, or you won't be able to see it. I make this derp a lot.) When you're satisfied, right-click the layer and rasterize layer style.
Step 11:
- Go back to Google a third time and find a pretty wood that you like. You don't want it to show too much direction, so no planks or anything like that. Really simple. I chose this. Copy and paste it ontop of your new layer, and then right-click your newest wood layer and select 'Create Clipping Mask'. After you scale it down some and have it set to your liking, use Levels and Hue/Saturation to adjust the tone until it matches up with the other wood (but make sure to keep it a little lighter than the rest).

Step 12:
- Again, you want to give the illusion of shadows. Go back to your rasterized stroke layer and add a drop shadow using layer styles. Make sure the distance is at 0, and you don't use too much or you'll completely black out the wood sides of your case.
Step 13:
- We're almost there! Looks pretty good, doesn't it? Now would be the time to add in any objects you want inside of the display case. Be mindful of lighting and shadows and you'll be good. If you like it as it, awesome. Let's move to step 14.
Step 14:
- Add a new layer BENEATH your rasterized stroke layer. Fill it with white and then drop fill down to about 10%. To make it look more like glass, add a gradient overlay. Make sure the Blend Mode is Hard Light, your Style is Reflected, and you reverse it so that the white is at the middle. I set my opacity to 15 percent, angle to 34*, and scale to 57*. At this point, if you want to adjust the shadow of your rasterized stroke layer to make it look more realistic, you may. I adjusted mine to 29% spread with a size of 8.
Step 15:
- You're basically done! Now would be the time to adjust the levels and colors of your image overall. I shoved all of my layers into one group, then added a black and white gradient map and adjusted the opacity to 50%. I'm now finished and can add it to the lair I'm working on. :)

I hope this was simple enough! If you have any questions, feel free to ask. <3 You can use this tutorial for tables and such, too. It doesn't have to excusively apply to shops.
P.S. - If anyone wants to use this one I made for the tutorial in their lairs, feel free.
Here's the psd.
Re: Lair Tutorials
Posted: 04 Jul 2013, 04:08
by Phoenix
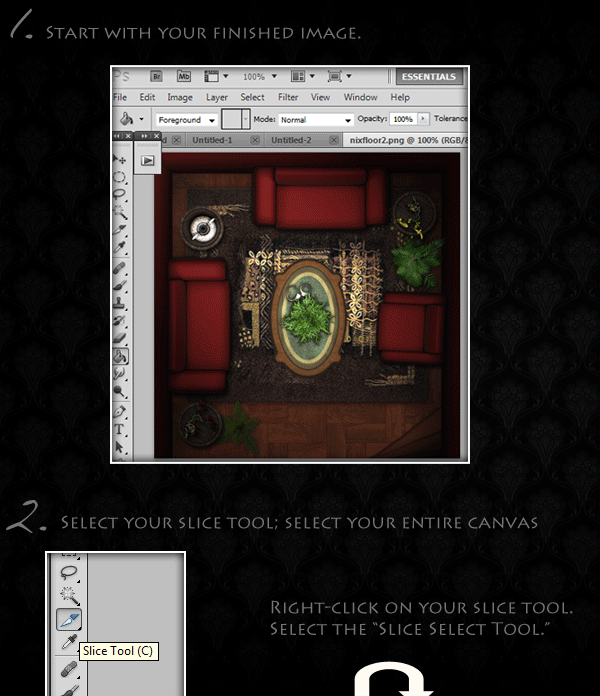
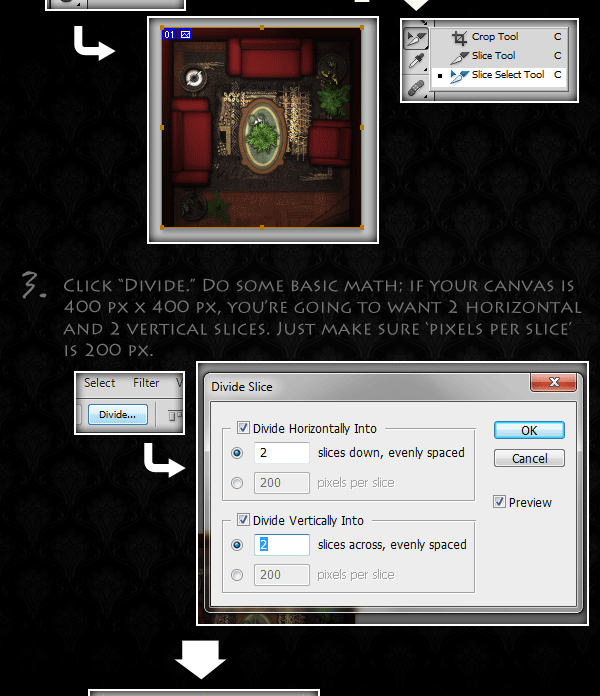
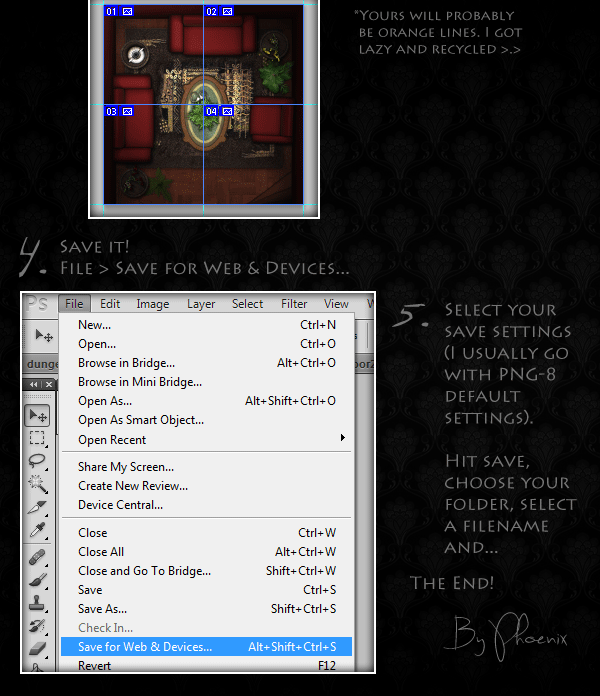
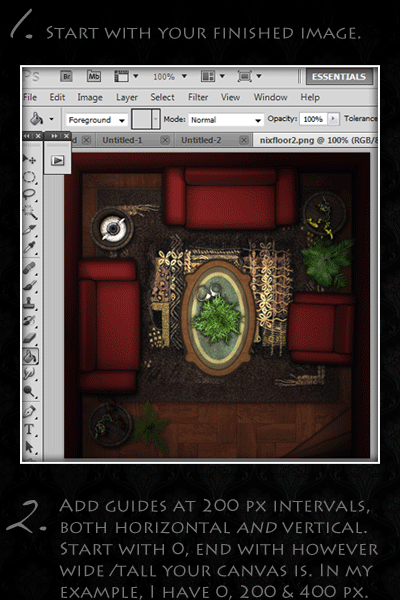
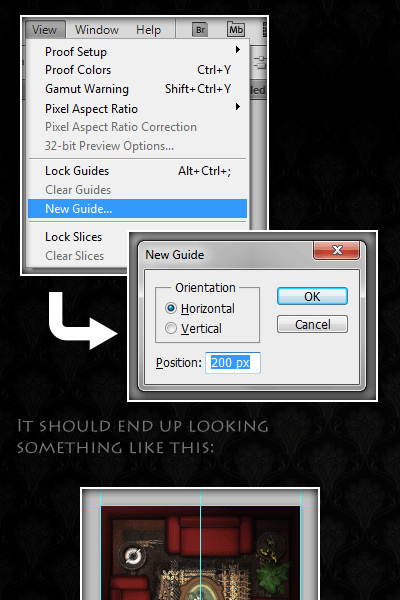
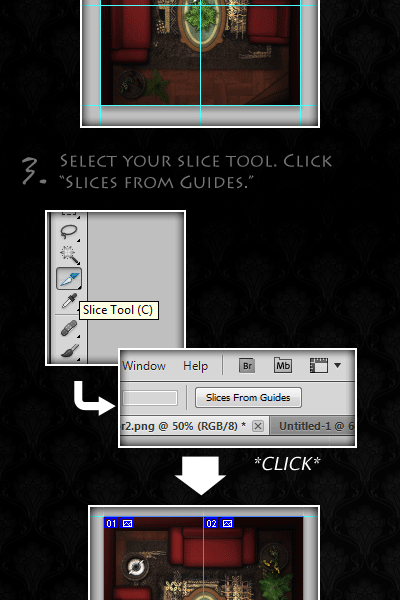
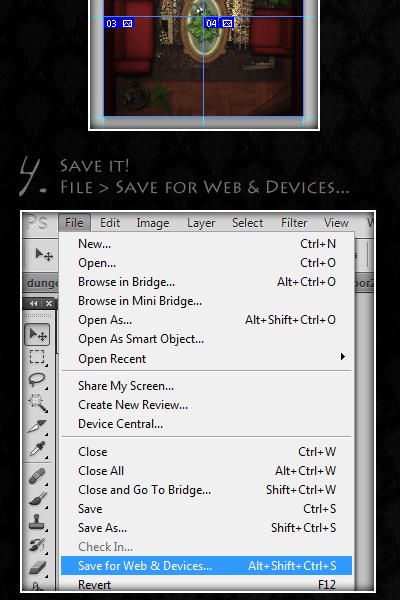
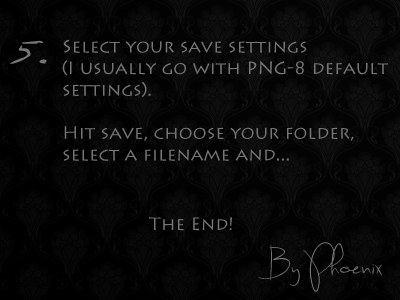
By popular request: PhePhe's Guide to Cutting in PS CS5 (I think this is backwards/forwards compatible).
Feel free to link to tutorials and stuff; I'll edit this post to add 'em.
Re: Lair Tutorials
Posted: 04 Jul 2013, 05:12
by Phoenix
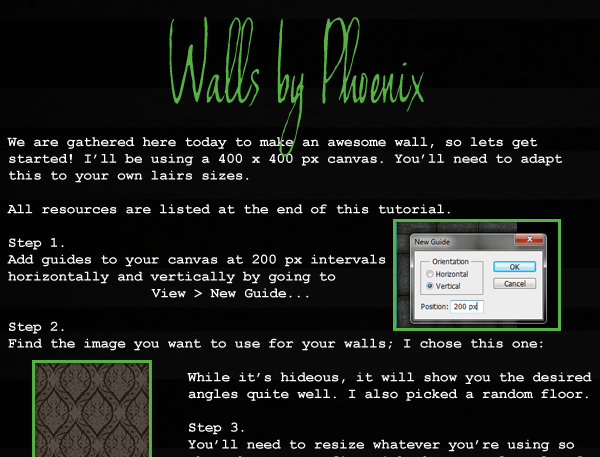
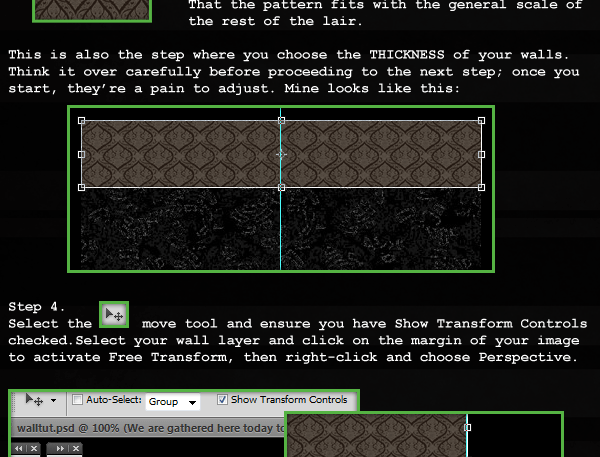
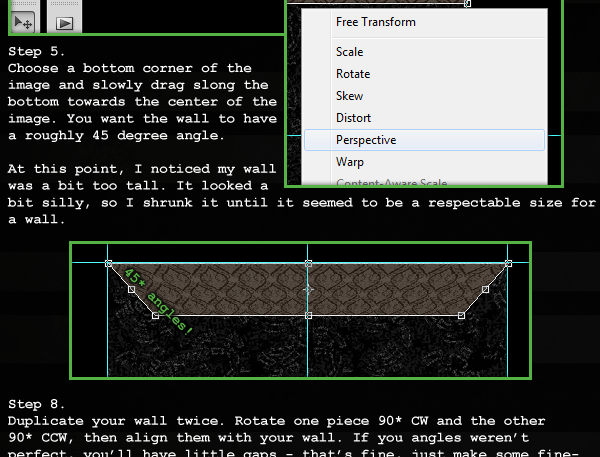
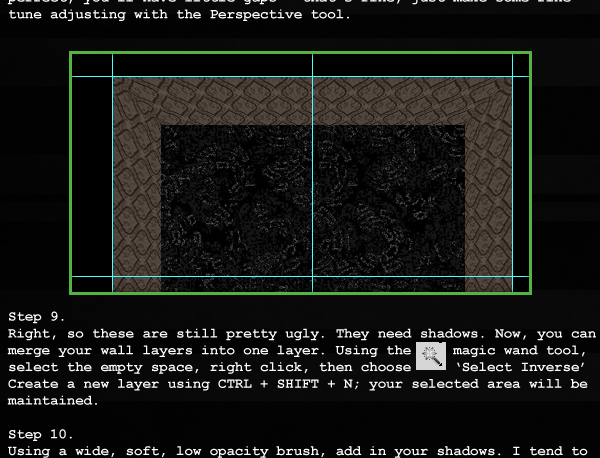
NOTE: If you want a more advanced wall tutorial, let me know. This one's super basic <.<
Re: Lair Tutorials
Posted: 04 Jul 2013, 17:23
by Amaranthia
*licks and sticks*
Re: Lair Tutorials
Posted: 05 Jul 2013, 11:17
by Mooncalf
This is an amaaaaazing thread. Well done.
Re: Lair Tutorials
Posted: 14 Jul 2013, 01:50
by Mortll
Ok most of us arent photoshop wizzes so this is a little program to help you out .
You want a nifty tub with water in it or you want reflections . this program will help you do it and its free.
http://www.xiberpix.net/SqirlzReflect.html
Re: Lair Tutorials
Posted: 25 Nov 2013, 19:40
by Toshiru
is there anywhere to get photoshop for free?
Re: Lair Tutorials
Posted: 25 Nov 2013, 19:56
by Odin
Not to my knowledge, but several good free art programs are
http://www.gimp.org/ and
http://inkscape.org/
Re: Lair Tutorials
Posted: 25 Nov 2013, 20:05
by Wafa


